I know you have been waiting for what seems like months and I keep teasing you with snippets here and there, but finally here is the whole shebang!
We had been planning to redo our outdoor kitchen for quite some time.
This area has evolved over the12 and a half years we have lived here.
The brickwork and levels were done by the previous owners.
Over time we have added a roof, floor, lighting etc.
We had a sink and cupboard that VCH did at least 10 or 11 years ago and then we had added a few old cupboards that had been replaced in other parts of the house.
But we had been slowly working up to a whole remodel and wanted a functional yet practical space.
We decided that this would be VCH holiday project this year.
Just before VCH started holidays I spied an old kitchen for free on Gumtree, not far from where we lived.
We went and picked up the whole kit and caboodle,
not sure exactly what we would use off it but knowing it would come in handy.
We mucked around with the various carcasses and came up with a layout fairly closely matching the one we had in mind.
VCH then went on a little trip to get the adjustable feet another Gumtree find.
Using the carcasses from the old kitchen saved VCH hours and hours of work,
so we were very grateful for the find!
We decided to build a little wall at one end to protect the cupboards from the weather and in this we placed a window that we picked up for $5 at the local second hand building site.
We pulled the the top bricks off what was the brick BBQ and VCH leveled it and cemented it.
This is where the gas BBQ and Pizza oven now sit.
The gas bottle is hidden away in the cupboard.
The sink and tapware is from the original Gumtree kitchen.
We decided to make new doors and drawer fronts but reused the hinges.
VCH routed the pattern into the MDF doors and then painted them the dark grey we have used around our house (Dulux Leadman)
I decided grey would tie in and not show up dirt or mildew like white would.
The handles are from my stash.
The bench tops were a laminated pine that we got from Bunnings.
VCH stained it with one coat of a cedar stain and then coated it with a gloss floor polyurethane.
We wanted a bar area and so left a gap in the cupboards to create one.
We still need to paint the sides of the cupboards you can see under the bar grey.
We still need to paint the sides of the cupboards you can see under the bar grey.
The bar stools were a garage sale find - $10 for the 4.
We still want to put a shelf along this wall and will make it with a narrow piece of left over benchtop.
Great for a pre-dinner drink and nibbles,
the kids have enjoyed ice cream sundaes here too!
This old freezer has seen better days and was originally VCH dad's.
It
still works well so I just gave it a coat of grey spray paint.
The chalkboard frame was one I picked up from an op shop and I used a pre-coated blackboard sheet from Bunnings cut to size.
I decided to leave the original finish on the frame as I thought it tied in nicely with the benchtop.
Here is the BBQ and Pizza oven looking towards the bench seating we also put in.
We used the same material as we did for the benches and then treated them the same way.
VCH attached them to the bricks with liquid nails and brackets.
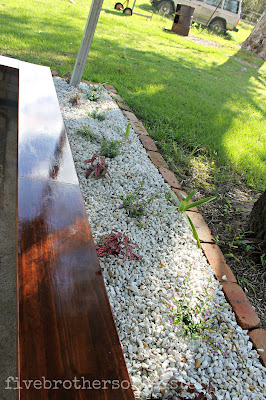
B4 helped me with the garden.
We still need to do something to the cement floor, at this stage we are debating a few different options.
In the end it will probably come down to time and money!
Doesn't it always?
You are welcome to join us here any Sunday night for Pizza!


Wow Deanne. That is awesome and talk about doing it on a budget.
ReplyDeleteIt is just awesome!!! You two and the boys make a great team!!
ReplyDeleteAmazing - love all your clever finds, and it looks sensational. Well done! xx
ReplyDeleteThat is amazing! I am so impressed that VCH routed the pattern into the MDF on the doors! That is seriously impressive!!! Also see that someone is a fellow LR Disco fan at your place! xx
ReplyDeleteWow Deanne, it looks amazing and very functional.
ReplyDeleteIt looks fantastic. I can't believe the grey paint looks so good. Now if you could just find some bargain priced slatey coloured tiles with a slightly rough finish so they're not slippery when wet...you'd have a good durable hose 'n' use floor.
ReplyDeleteLooks wonderful! I'd love to hang out there with you (and eat pizza!! :)
ReplyDeleteSusan
Dea it's lovely. Your abilities to recycle and repurpose something into a thing of beauty are boundless.
ReplyDeleteI think a polished concrete floor would look fabulous. Tiles are very slippery if they get wet.
Carolyn
wow, now that's an outdoor kitchen! unbelievable!!!!
ReplyDeletekeya
Fantastic Deanne! Love the colour you've used. And the bench seating looks great :)
ReplyDeleteoh wow!!!! i am all sorts of jealous right now, but in a good way! ;) LOVE it, deanne!
ReplyDeleteYour outdoor kitchen looks amazing! I love that those doors are routed...and the bar stools....$10 for 4...now that's a steal of a deal. Totally jealous (especially because we are still in snow!)
ReplyDeleteOMG!! what a awesome outdoor kitchen! I am speechless! You even have a pizza oven! WOW! Thank you for linking up.
ReplyDeleteEven with the photos, Deanne, you love giving snippets! But even so, it seems really spacious. :D I'm not sure if it's just the illusion of putting the main fixtures parallel to the wall. Can you show me an establishing shot, please? *puppy eyes* And the makeshift bar turned out really awesome! :* -->Angelina
ReplyDeletehi..love this redo.makes me want to give ours a revamp-love dee x
ReplyDeleteMaking your outdoor kitchen more functional is really a great idea. It will not only beautify your space, but also create a place where you and your guests can relax and hold parties at the same time. Sweet, right? You have a good list of plan for your outdoor kitchen, by the way. I hope you achieved it all once done. Mark @ LandScaperVirginiaBeach.com
ReplyDeleteLooks great, love the grey.
ReplyDelete